fabric

Seeing (dye) spots

Several weeks ago I was dyeing a scarf with "navy". Or at least that's what it said on the label. What's important to know in this account is that dyes are either pure or, well, not pure meaning that they are formulated with a combination of pure dyes to get that specific color. That color you think you need, but really you don't. You know the ones - the ones with the fancy names like 'geranium' and 'dark sky' and 'meadow green'. I usually stay away from them since I enjoy mixing colors on the fly, and they teach you in school you're only supposed to need three technically. But when it comes to really dark colors like navy, I don't mess around.
Now this may seem trivial. Pure. Not pure. What are you getting at, Tara? Oh, it matters for one very important reason. If you don't fully dissolve the dye or if for some reason you are super sloppy and a small teensy-weeny grain of that powdered dye gets on your cloth while it sets you will get spots. Spots that won't come out or blend because the cloth is hungry for anything it can possibly soak up. Case in point:
Yes, that is a fuchsia spot in the middle of my navy dye job. You type A's are thinking, "How in the world did that happen?? How is it even possible to not dissolve dye?!" and you type B's are thinking, "Oh, it's just part of the process, dear. It's beautiful. Embrace it."
So I'm going to embrase my type B side for a moment. After this 'tragedy' happened, I thought, "Why not take this mistake and make it a deliberate thing?" Let's try it out, shall we? 

I used a urea and water mixture to keep the cloth wet while the dye set overnight. Urea is a humectant, meaning that it attracts water. Or, put another way, since urea is present on the cloth, water has difficulty evaporating leaving more time for the dye to set. Since black is made up of just about every color, I started there:

Ooooh, pretty. And as I placed salt on top (to help further set, disperse the water, and deepen the color) things started to spread:

Lovely! I suppose we'll see what happens soon? Thank you B's! Until we meet again...

Upholstery 101: Know when to fold

I know I mentioned that the upholstery was slow going. Well, it proved to be a snails pace when I started to actually cover things. When upholstering, the goal is to first tack everything down so that it looks how you want, then staple to finalize. The tacks are super easy to get out and reposition. Except in my case, of course.

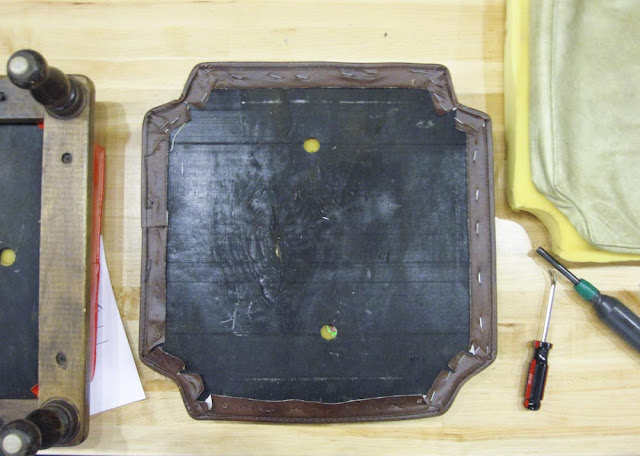
Turns out I bought super high density foam and that, paired with the fact that the plywood on the underside is treated with some sort o strange tar material (maybe it's a fireproofing material?), makes for impossible tacking. The hammer bounces all over the place because of the foam, and they don't stick when hammered in. If I did get some to stick, they just popped out the second I placed my staple gun down to seal the deal. 

Oh, how slow going it was! In the end I got so frustrated, I put down my hammer and just started to staple. That's a pretty huge no-no, but in the end I was surprised with how even I got each one. Definitely won't do that with future upholstery projects, but what's that phrase? Know when to hold 'em and know when to fold 'em. Yep, got it.

Upholster 101: Memory Lane

The upholstery project I set out to complete has been a little slow going. Mostly it's because I can't figure out what material to reupholster the stackable foot rests with. But more on that another day. I figure it's better to take one thing at a time, so I set out to disassemble them to see what I was up against.

 Thankfully the staples used were super easy to get out, so taking them apart was the easy part. First the white pleather one, then the red one, then the brown one...

Oh, that dark brown cushion was an emotional one. It took me on a trip down memory lane. There were two holes in the plywood underneath each cushion and upon further notice...

What's this I see? A little treasure from the past! I recognized it immediately as a scratch and sniff sticker I had when I was super little. It was probably even a hand-me-down sticker from my sister dating it from.... well, let's just say a long time ago. 

I removed the cover and found the scratch-n-sniff mostly in-tacked along with a penny from 1964. Sweet!

The best part? IT STILL SMELLS LIKE CHOCOLATE WHEN IT'S SCRATCHED! Ah, memories. Although makes you wonder what they used on that sticker for it to smell 30 years later...

Today's inspiration....

...comes from one of my favorite antique store I've mentioned before: The Chicken Barn! This old 8-track player presented itself - it folded onto itself like a brief case and with the eight track player at top. The speakers had this funky woven fabric over top.


Don't you just love the color combo? I might have to lift it directly for my next woven piece!

The Over Dyeing Primer

Oh, I have learned so much the past couple months. This post is no exception. Remember the "easter egg scarf"? I know - you're tired of me talking about it. Well, I decided to over dye it.

(Warning: may be boring for those who do not want to learn about the fine points of protein fiber dyeing.)

Thankfully, I had some left over yarn that I had used to weave the scarf. 

I made little bundles of fiber out of the leftover bobbins to see what would happen to the already colored fiber.

So I mixed a few dye pots with different colors to test what would happen to each color. Always do test swatches so that you know what will happen to the scarf. No need to put the setting agent into dye pot since there's no need for it to set. Just a little dye and hot water to dissolve it will be enough to get a test dye pot to dip into.

 The goal was to get it to look like this (the third from the left, above).

Except I made one glaring mistake.

I really wanted to get a "cool" shot for the blog.  Except it took me a good minute to find my camera, take off my gloves, and take the picture:
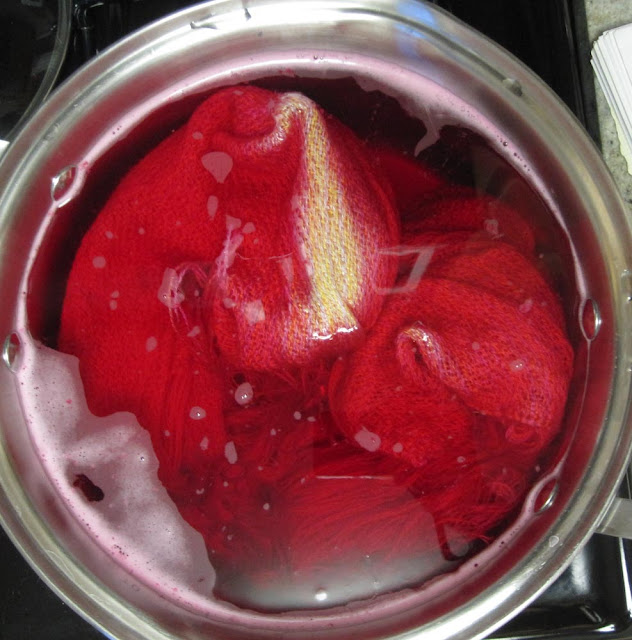
Can you guess what happened? Yep, I had this huge area that didn't get dyed. And I wasn't able to stir the pot either, so the entire scarf was just strangely streaked - and not in a good way.

And if you have such a little amount of dye in the pot, it takes very little time for the fiber to soak it up. It took maybe 4 minutes for the dye to disappear.
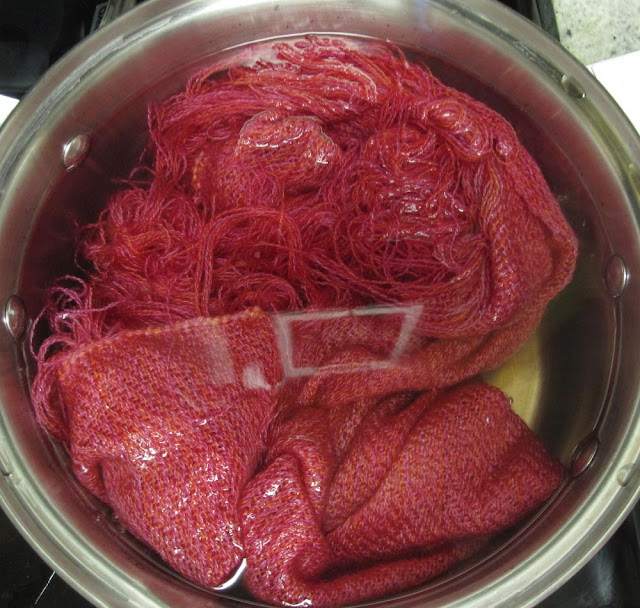
So I had to add about 3 times the amount of dye that I really wanted to add in order to get something that looked okay. And practically burned my hand off in the process.
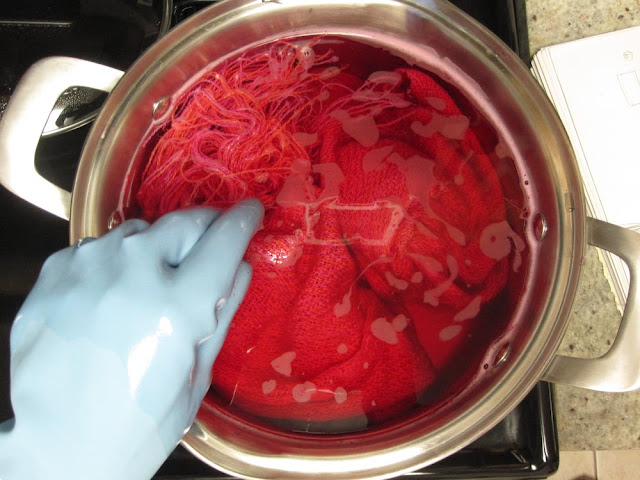
Either way, it still came out beautiful. Just not quite the colors I thought. Oh well. Next time!
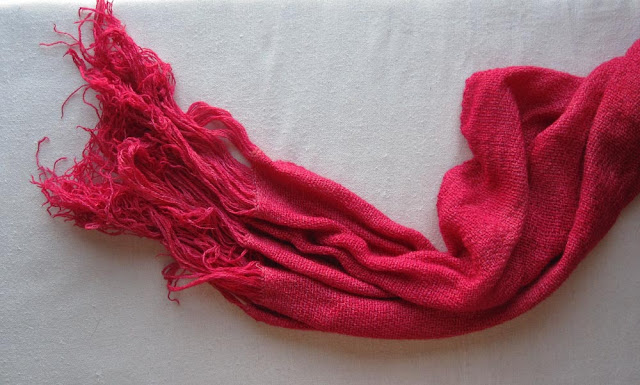
What I learned and want to pass on to other newbie dyers:

1.) Always do a dye swatch test to see what will happen when you over dye. I was very unsure what the yellow would do when I added it to the fuchsia and brick red dye pots. After I did swatches, I knew!

2.) Have a large enough dye pot. There is something to be said to have the fiber "swimming" around freely. Do not skimp in this. Find old pots at Goodwill stores or if you have a friend who cans their own food you might be able to score an old large pot! The pots I currently have are not big enough for dyeing fabric. It's fine for my warps (think warp = 1/2 the amount of fiber than the fabric it makes). The last time I went to Reny's (best savings store ever - a Maine institution), I wanted to find a $20 lobster pot but since it was the end of summer, all the pots had already been snatched up for their intended use. Next time, Reny's!!!

3.) When dyeing any sort of protein fiber - that is an acid dye using heat - the minute it hits the dye bath is what the object will look like, so be especially careful with small amounts of dye. If you don't submerge evenly and start stirring right off the bat, you might get splotchy coverage.

4.) Even though rubber gloves feel like they are insulating you from a boiling pot of water - um, I don't need to finish that one, do I?

5.) Be prepared with the camera, if you're documenting. Or have someone else do it for you. Don't let your ego get in the way. The craft should come first!

Stupid Sale...

I went to IKEA in August, and they always put their fabric from the previous season on super sale. I'm pretty sure this was part of last year's winter fabric. Something attracted me to it.

Then I did something I "never" do, I bought 6 yards of it. Yeah. That's a lot. I don't normally do that since I need to have a project in mind, or else it will never get used. But it was cheap, and it's a heavy weight cotton. Don't worry, it's getting used.

I'm making pillows - more on that soon. And maybe a quilt? I'll certainly have enough fabric for that...