I've never used one, but wanted to try one, but didn't want to buy one. They're pricey, it would take a while to arrive because I'd have to mail order it, and who knows if I'd even like to use it. It also seemed like something I could make. So I decided to put my creative problem solving to the test. Since I don't have access to a super stocked prototyping shop anymore, I often find myself scratching my head wondering how to whip up something it normally took me a few minutes to make. I'd like to say that it's developed my problem solving skills even more.
"All I need is a piece of wood or plastic a few millimeters thick with slots and holes," I thought. Simple, really. Popsicle sticks would totally work, but I'd have to go out and buy them and I wanted something a little more durable.
And then I had that ureka moment: "I HAVE SHRINKY DINK SHEETS!" (I literally said it aloud and woke up a sleeping cat.)
Apparently I introduced my boyfriend to the joyful world of Shrinky Dinks. Oh, Mainers. Granted, living in remote Maine, he didn't have access to toy stores like I did growing up in suburban CT, but really? Not grow up with the wonderment of a shirnky dink? So, for those who don't know, they were "kits" with several plastic sheets of your favorite Disney/My Little Pony/Transformer, etc characters outlined in black for you to color in. Using the provided colored pencils, you'd color a little life into the outlines. Then, when baked in the oven, they would magically shrivel up and flatten out into little half-pint versions of their original selves. I have found memories of my face planted next to the oven window watching in amazement as they transformed.
Apparently now they come complete with dioramas. Which makes sense. I mean, what did I do with those little things once shrunk? Stuck them to the windows only to be forgotten about and then thrown out by a parental unit. Great, I just gave myself 'recycler's guilt'.
Okay, enough. If you're interested in how I made a paddle out of "shirnky dink" material, feel free to check out my instructions below!
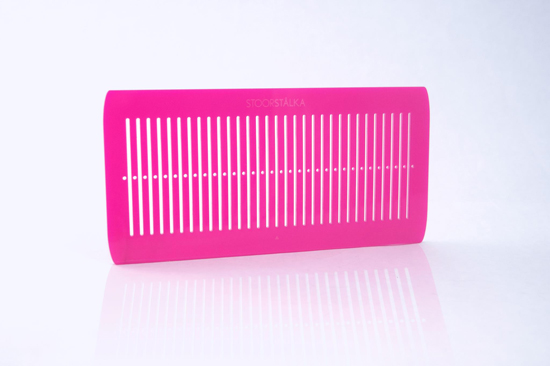
DIY Weaving Paddle

You'll need:
- One 10.5"x 8" sheet of shrinky dink plastic** [it's polystyrene (PS, #6 recycle symbol) for you nerdy types]
- My template (or you can use your own)
- Exacto blade
- straight edge
- hole punch
- cardboard (I used the back of a legal pad)
- 400 grit sandpaper
- alcohol and cotton ball
- markers or color pencils to decorate (optional)
**Polystyrene will shrink roughly to 45% of it's original size, so just be conscious of that if you're using your own template or if you don't want to buy shrinky dink sheets and use a muffin container with a #6 recycle symbol that isn't quite as big as I used.

1.) Rough up both sides of the sheet with sandpaper. I do this because I don't like the way the pastic feels after shrinking. (I'm weird when it comes to tactile things! Why do you think I like fiber?!) It also helps when adding any sort of color or markings, not to mention it reduces the static electricity issue of super smooth plastic. Stuff will stick to it and then it gets baked in and then it's just gross.

2.) Remove excess dust with alcohol and a cotton ball. If there are bits of dust they'll melt in when shrinking. Not cool.

3.) Print out template - make sure you print it at 100%, or else the scaling will be off when you go to shrink the plastic. Tape the piece to the template. (Ignore the fact that I started to trace - totally realized that was unnecessary after I taped the template on!)

4.) Starting with the small holes, cut out the holes and slots with the exacto blade and straight edge. If you do all the long slots first, it'll be super difficult to cut out the smaller ones between.


5.) Punch out edges of slots and holes with the hole punch. This relieves the stress at the corner of the squares and keeps the plastic from tearing. [Nerd fact #2 in this DIY.]
 |
| I was feeling punchy. |
6.) Decorate if you'd like.
Now comes the fun part.
7.) Heat oven to ~310 degrees. (Anywhere between 300-350 deg is fine.) Place plastic sheet on a piece of cardboard and place in oven.
8.) Watch as it shrinks! (Sorry I don't have pictures!) It will curl up and get all wonky, when it does this DO NOT FUSS WITH IT. Don't worry it'll flatten out. I swear. If for some reason it sticks to itself - it should correct itself, you just have to wait - but if not take it out and release it, pop it back in the oven and let it finish.
9.) When it's all shrunk down and flattened out you know it's done. Take it out and evaluate if you need to push the slots together (they might be skewed a little). You now have my permission to fuss with it. If it hardens before you have a chance to fix it, just reheat in oven until pliable.

And voila!